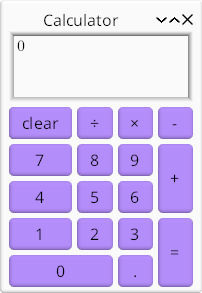
Calculator: make_widget and grid layout
Topics: grid layout, access keys
use std::num::ParseFloatError;
use std::str::FromStr;

use kas::event::NamedKey;
use kas::prelude::*;
use kas::theme::FrameStyle;
use kas::widgets::{AccessLabel, Adapt, Button, EditBox, Frame, column, grid};

type Key = kas::event::Key<kas::event::SmolStr>;

fn key_button(label: &str) -> Button<AccessLabel> {
    let string = AccessString::from(label);
    let key = string.key().unwrap().0.clone();
    Button::label_msg(string, key)
}
fn key_button_with(label: &str, key: Key) -> Button<AccessLabel> {
    Button::label_msg(label, key.clone()).with_access_key(key)
}

fn calc_ui() -> Window<()> {
    // We could use kas::widget::Text, but EditBox looks better.
    let display = EditBox::string(|calc: &Calculator| calc.display())
        .with_multi_line(true)
        .with_lines(3.0, 3.0)
        .with_width_em(5.0, 10.0)
        .with_margin_style(kas::theme::MarginStyle::None);

    let buttons = grid! {
        // Key bindings: C, Del
        (0, 0) => Button::label_msg("&clear", Key::Named(NamedKey::Clear))
            .with_access_key(NamedKey::Delete.into()),
        // Widget is hidden but has key binding.
        // TODO(opt): exclude from layout & drawing.
        (0, 0) => key_button_with("", NamedKey::Backspace.into()),
        (1, 0) => key_button_with("&÷", Key::Character("/".into())),
        (2, 0) => key_button_with("&×", Key::Character("*".into())),
        (3, 0) => key_button_with("&−", Key::Character("-".into())),
        (0, 1) => key_button("&7"),
        (1, 1) => key_button("&8"),
        (2, 1) => key_button("&9"),
        (3, 1..=2) => key_button("&+"),
        (0, 2) => key_button("&4"),
        (1, 2) => key_button("&5"),
        (2, 2) => key_button("&6"),
        (0, 3) => key_button("&1"),
        (1, 3) => key_button("&2"),
        (2, 3) => key_button("&3"),
        (3, 3..=4) => key_button_with("&=", NamedKey::Enter.into()),
        (0..=1, 4) => key_button("&0"),
        (2, 4) => key_button("&."),
    };
    // We use map_any to avoid passing input data (not wanted by buttons):
    let buttons = Frame::new(buttons).with_style(FrameStyle::None).map_any();

    let ui = Adapt::new(column![display, buttons], Calculator::new())
        .on_message(|_, calc, key| calc.handle(key));

    Window::new(ui, "Calculator")
        .escapable()
        .with_alt_bypass()
        .without_nav_focus()
}

fn main() -> kas::runner::Result<()> {
    env_logger::init();

    let theme = kas_wgpu::ShadedTheme::new();
    let mut app = kas::runner::Runner::with_theme(theme).build(())?;
    let _ = app.config_mut().font.set_size(24.0);
    app.with(calc_ui()).run()
}

#[derive(Clone, Debug)]
struct Calculator {
    // ...
}

impl Calculator {
    fn new() -> Calculator {
        Calculator {
            // ...
        }
    }

    fn display(&self) -> String {
        // ...
        String::new()
    }

    fn handle(&mut self, key: Key) {
        // ...
        let _ = key;
    }
}
The back-end: Calculator
First things first, lets define our backend, Calculator. It must have:
- Internal state (fields)
- A constructor (
new) - Some type of output. A
displayfunction returning aStringwill do. - A handler for button presses. We'll just pass a
Keytofn handle.
Fill out the implementation yourself or copy from the full source.
Access keys
To make the calculator keyboard-accessible, we'll use access keys (see more on Wikipedia or Windows app docs). Kas supports these via:
AccessStringsupports parsing things like&Fileas the labelFilewith access key FAccessLabelis a label widget over anAccessStringwhich sends the messageActivatewhen its access key is pressed. AButtonwidget will react to this message.Button::with_access_keymay be used to specify arbitrary access keys.
Button helper fns
To make constructing buttons easier, we define some helper functions. (These facilitate defining the button message more than they do the access keys.)
#![allow(unused)]
fn main() {
use kas::text::AccessString;
use kas::widgets::{AccessLabel, Button};
type Key = kas::event::Key<kas::event::SmolStr>;
fn key_button(label: &str) -> Button<AccessLabel> {
    let string = AccessString::from(label);
    let key = string.key().unwrap().clone();
    Button::label_msg(string, key)
}
fn key_button_with(label: &str, key: Key) -> Button<AccessLabel> {
    Button::label_msg(label, key.clone()).with_access_key(key)
}
}
Navigation focus and Alt-bypass
Normally, access keys are only active while holding Alt. To avoid this requirement we call with_alt_bypass. Further, we disable Tab key navigation with without_nav_focus and ensure that the window can be closed with the Esc key.
#![allow(unused)]
fn main() {
use kas::{Widget, widgets::{Label, Adapt}, window::Window};
#[derive(Debug)]
struct Calculator;
impl Calculator {
  fn new() -> Self { Calculator }
  fn handle(&mut self, _key: ()) {}
}
fn ui() -> impl Widget<Data = ()> {
let ui = Label::new_any("");
    Window::new(ui, "Calculator")
        .escapable()
        .with_alt_bypass()
        .without_nav_focus()
}
}
Grid layout
We already saw column and row layouts. This time, we'll use grid! for layout.
#![allow(unused)]
fn main() {
use kas::event::NamedKey;
use kas::prelude::*;
use kas::widgets::{AccessLabel, Button, Frame, grid};
use kas::theme::FrameStyle;
type Key = kas::event::Key<kas::event::SmolStr>;
fn key_button(label: &str) -> Button<AccessLabel> {
    let string = AccessString::from(label);
    let key = string.key().unwrap().clone();
    Button::label_msg(string, key)
}
fn key_button_with(label: &str, key: Key) -> Button<AccessLabel> {
    Button::label_msg(label, key.clone()).with_access_key(key)
}
fn ui() -> impl Widget<Data = i32> {
    let buttons = grid! {
        // Key bindings: C, Del
        (0, 0) => Button::label_msg("&clear", Key::Named(NamedKey::Clear))
            .with_access_key(NamedKey::Delete.into()),
        // Widget is hidden but has key binding.
        // TODO(opt): exclude from layout & drawing.
        (0, 0) => key_button_with("", NamedKey::Backspace.into()),
        (1, 0) => key_button_with("&÷", Key::Character("/".into())),
        (2, 0) => key_button_with("&×", Key::Character("*".into())),
        (3, 0) => key_button_with("&−", Key::Character("-".into())),
        (0, 1) => key_button("&7"),
        (1, 1) => key_button("&8"),
        (2, 1) => key_button("&9"),
        (3, 1..=2) => key_button("&+"),
        (0, 2) => key_button("&4"),
        (1, 2) => key_button("&5"),
        (2, 2) => key_button("&6"),
        (0, 3) => key_button("&1"),
        (1, 3) => key_button("&2"),
        (2, 3) => key_button("&3"),
        (3, 3..=4) => key_button_with("&=", NamedKey::Enter.into()),
        (0..=1, 4) => key_button("&0"),
        (2, 4) => key_button("&."),
    };
    // We use map_any to avoid passing input data (not wanted by buttons):
    let buttons = Frame::new(buttons).with_style(FrameStyle::None).map_any();
buttons
}
}
Worth noting is our hidden Backspace button. This is just another cell, but hidden under the clear button. Yes, this is a sub-optimal hack.
Again, we use .map_any() to make our buttons (input Data = ()) compatible with the parent UI element (input Data = Calculator).